Wednesday, 21 May 2014
Total cost of our garden!
We are now finished with designing our garden project. We had great fun over the last few weeks getting all of our ideas and plans organized and finally creating our photostory. Now we are waiting for the results to be announced! It will be very hard for our school to choose a winning team, as every group has come up with brilliant ideas and have worked very hard. Mr. Curtin asked us to add up the total cost of our garden and it is 5975.62. This price includes all of the flowers, insects, the underground water sprinkler system which we were hesitant to put in due to its cost, all of the soil, fences, paint and all the other garden practicalities.
Monday, 19 May 2014
The finished photostory!
Our garden group managed to get our final photostory finished last Friday. We spend a lot of time and effort with this photostory. During this week, or early next week we will be presenting our photostory's to our school principal, and other members of our school community. We hope you enjoy our photostory!
Friday, 16 May 2014
Lots of ICT tools

Mr. Curtin asked us to use as many ICT tools as we wanted to help bring our presentation to life. We recorded sound and enjoyed taking photographs for our blog. Here are some of the fun tools we used!


Wednesday, 14 May 2014
Working on our final presentation!
This week all of the groups are very busy getting their final presentation ready! We need to have our photostory finished by Friday so that our principal can pick the winning team! All of our groups planned out their photostory on a A3 piece of paper. We are now in the making of our final photostory!:) Best of luck to all 5 groups:)

Recycling rain water ?!
As we all know, unfortunately water rates are coming in next year! Our school will be trying their best to not waste any water. We are very lucky that Kevin's dad actually has a company where they set up a system which recycles the rain water from your roof! Check out the leaflet down below!:)
.jpg)
Tuesday, 13 May 2014
.JPG)


Monday, 12 May 2014
The nappy experiment!

Today in school Mr. Curtin picked a few people to help him try out the nappy experiment. The first thing we did was we filled a nappy with water. After the nappy had absorbed all the water we ripped the nappy open. Inside the nappy is a thing called Hydrogels. Hydrogel looks very like snow or crystals. We then began to empty all the hydrogel into a small container.


Once all the hydrogel had been emptied into the containers we brought them down to the staffroom where we put them in the fridge for an hour.

After an hour, Mr.Curtin picked 9 people who would plant suttons. We were put in pairs and each pair got two pots. In one pot we mixed the soil with the hydrogel and planted the seeds. The hydrogel helps the plant last longer with less watering. In the other pot we put small pieces of cut up banana skin around the top of the soil. We then planted some more seeds in that pot. Now we are going to keep and eye on the pot and see which works better the hydrogel or the homemade banana fertilizer! We will keep you updated with our results:)


Friday, 9 May 2014
Our own garden games!
During computer time today in school, some very talented computer genius's discovered a really cool website for creating you own online games! The website is called Sploder . Sploder is like a simpler version of scratch. Nicole from our group made a game herself. This game is not the best, but its better than nothing!:)The aim of this game is to try and reach the garden full of flowers. Nicole is working on creating another level for this game but for now there is only one!:) Enjoy!
Make a Free Flash Game
I would just like to say a big thank you to Jitesh for uploading a video on how to upload a game onto your blog. Without that video, our group would have been completely lost! Thanks Jitesh! :)
Our mock photostory!
In computer class today we were working in our garden groups to create a mock photostory. We used lego minifigures to create the photostory. Next week we will be creating our proper photostory. This is only a trial run, using random lego minifigures pictures that were saved on the school computers. Please check it out and let us know what you think!:)
Thursday, 8 May 2014

Wednesday, 7 May 2014
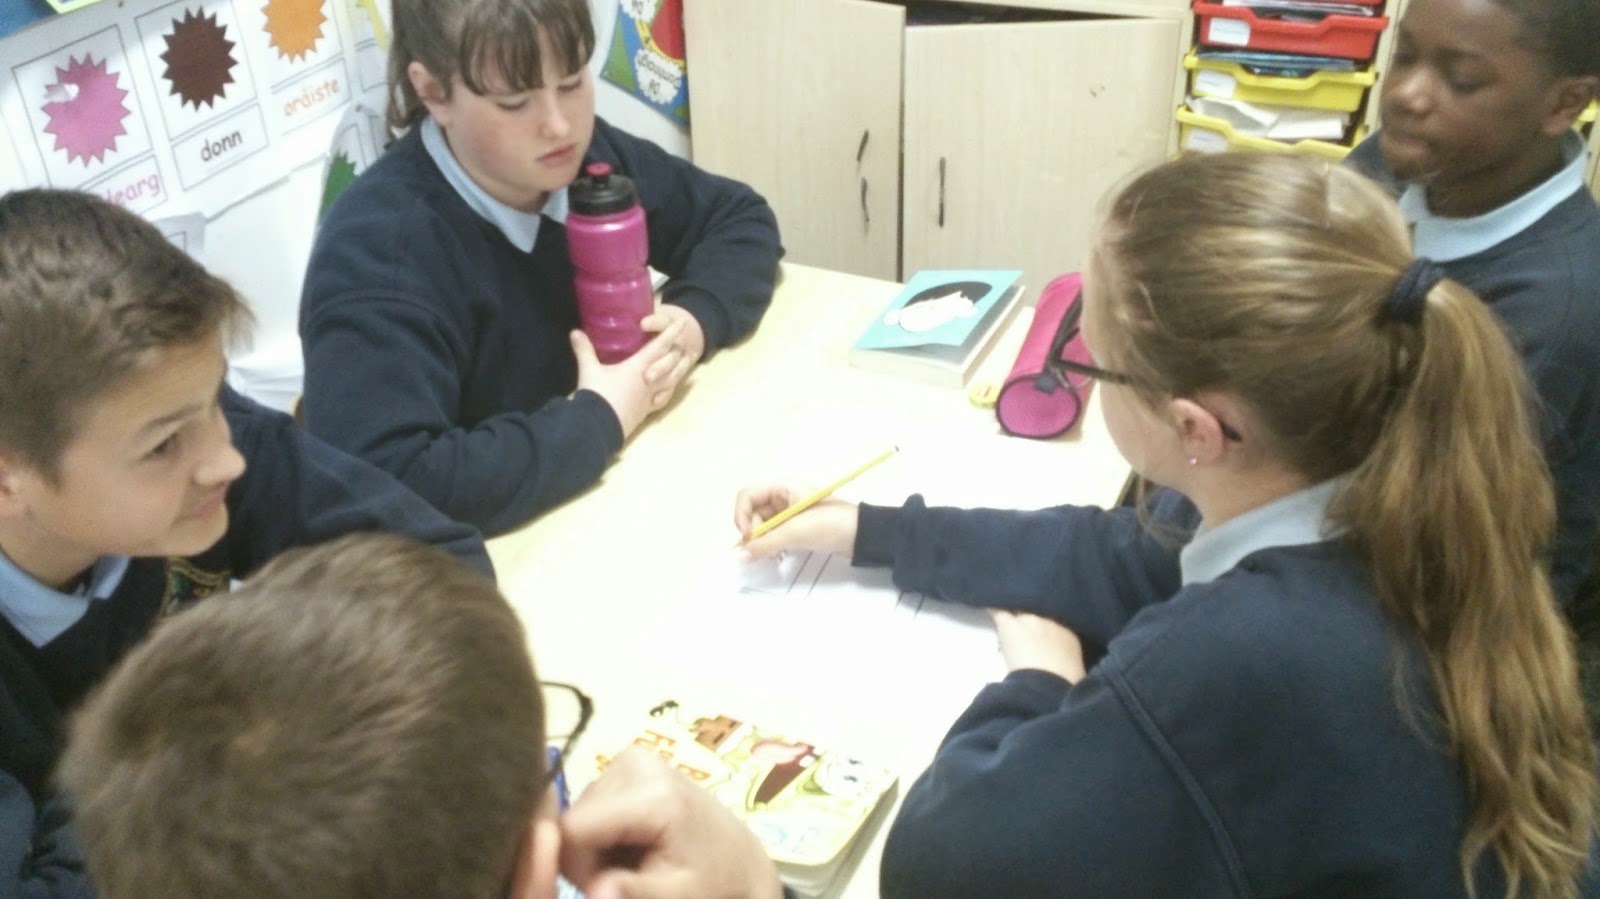
Groupwork!
Today our group were busy working together to start planning out our garden photostory. At the end of this week/ start of next week we will be creating our photostory. Today we designed plans to help us stay on track and so we know exactly what we need to put in our photostory! Mr. Curtin took some photos today of our group working!

How to make your own compost!

Jimmy who is our team captain and is also in charge of green schools decided that we should make our own compost for the garden! He found out how this is done. Read on to find out how you can make your own compost for your garden!
A great source of bulky, organic material is your own garden compost. The best time to make some is in spring, because it will rot down faster. It’s dead easy to make, it costs nothing and it does the garden a whole lot of good. You can either buy a bin - many local councils run recycling schemes, so give them a call - or make your own heap.
| What you need: If using a self-assembly version, as shown here, you will need:
|
| First prepare the compost area If erecting your own bin, hammer into the ground four 10cm x 10cm (4in x 4in) posts to enclose an area about 1sq m (40sq in.) Then bash the soil with the back of a spade to consolidate it. |
| Next either tack wire netting to the posts, or nail planks around them, leaving the front side easily detachable so you can get the finished compost out. |
| Add the drainage material In the bottom put a 10cm (4in) layer of coarse material, such as straw or twigs. |
| Make the sandwich Put in a 15cm (6in) layer of garden waste and water if it’s dry. Put in alternate layers of different materials - like a sandwich. |
| Turn up the heat Compost has to heat up to work properly. To do this it needs to have a certain critical mass. A metre cubed is good. It must also be layered to heat up effectively. On top of each layer add a sprinkling of manure or soil. This helps to introduce the bacteria and fungi (or 'heat') needed to break down the organic material. |
| Cover it up Then cover with a sheet, an old bit of carpet, polythene or tarpaulin and leave it for about three months to rot down. Uncover, open the front, take all the compost out, then put it back again. This process adds air to the mix and helps it rot down faster. |
| Three months later… Leave for another three months and your compost will be brown, crumbly and sweet-smelling; ready to use in the garden. I hope this helps you all with your garden! |
How does beer kill slugs?
Mr. Curtin gave our group another challenge today on how does beer kill slugs. Nicole found this video on youtube on how this works:)
Also Andrea found a cool website which explains how beer kills slugs:)
http://www.slugoff.co.uk/killing-slugs/beer-trap
Tuesday, 6 May 2014
Great garden blogs!
All of the groups are very busy this week gathering the final bit and pieces for their garden projects! We are all trying to find really good websites and blogs to give us more information! Andrea found a very good blog set up by a girl named Shirley Bovshow. Shirley lives in Los Angelas and she designs gardens for people. On her blog she gives a lot of tips and tricks for garden vegetation, garden artwork and more! This blog is defiantly worth the look at! The link down below will bring you straight to her blog.
http://edenmakersblog.com/#sthash.lEbyFwz4.dpbs
Monday, 5 May 2014
How to kill weeds using bleach!

Step by step:
- Buy a bottle of full-concentrate bleach.
- Find a spare empty spray bottle to hold the bleach in.
- Pour undiluted bleach into the spray bottle. Take extreme caution while doing this as you don't want to get the bleach on your hands as this will cause irritation to the skin!
- Screw the bottle tightly closed.
- Locate the weeds on your garden that you want to get rid of and lightly mist them with the bleach.
- Spray the weeds roots with bleach. Be careful not to spray any plants or grass which you want to keep in your garden!
- After two or three days, return to your weeds and pull them out. The bleach makes the weeds come out of the ground a lot easier.
Hopefully this will help you free your garden of pesky weeds!
Saturday, 3 May 2014

Friday, 2 May 2014
Top 5 good and bad bugs for your garden!
During the week Andrea found a very good video which explains what insects you should have in your garden and which insects you shouldn't have! This video was very helpful to our group and we think it will be helpful for your garden project! The video also shows you how to release ladybirds correctly into your garden!:)
It's all about teamwork!

Our group have been very busy this week trying to really make our garden project come to life! This week in school we will be working really hard to get ready to present our project to our school community! We have to put all our pieces together to make a photostory and we must get all our ideas ready! If you have any good websites to help us please leave them below:) We would love your help for our project!
How to make a simple homemade fertilizer!

Banana's are very healthy for humans, but did you know that they also are extremely healthy for plants? Mr. Curtin gave us another challenge to figure out and the challenge was:
How does a banana peel help us with our soil!
Nicole figured out the question:
Banana peels work as a inexpensive and natural replacement for expensive fertilizers. Chop your banana peel into small pieces and simply mix it into the soil around the base of your flowers! :)
How do diapers help plants grow?!
Our teacher recently gave us the challenge of finding out how do diapers help plants grow. We all thought our teacher was crazy when he told us that diapers can help your plants grow! But he was right! We discovered how this works!
You will need:
- An ordinary disposable diaper
- Water
- Soil
- Mixing bowl
- Fill your diaper with roughly 4 cups of water. You will notice that after a few seconds all the fluid has been absorbed.
- Rip the diaper open and put the contents into your bowl.
- Add some more water and mix the two together.
- Freeze the contents over night.
- Now you need to mix the hydro gel with your soil until they are completely mixed.
- Now you have a super absorbent soil that is light and fluffy and perfect for your plants!
Thursday, 1 May 2014
Jimmy's Weavesilk!
During computer time today in school, Jimmy made a rose using weavesilk! Defiantly worth the look!

Subscribe to:
Posts (Atom)